If you’re on the lookout for a fun, easy, creative, free (probably) spring break activity for the kids, check out these cute little coasters… or mug rugs if you prefer.
Did you notice I said it’s free?! Seriously. You have no reason to purchase anything for this project. Unless you’re one of those unfortunate souls who doesn’t have a ready stash of yarn and fabric, then you might buy a couple of fat quarters, regular 1/4 yards of fabric or some yarn. However, this project also lends itself to using recycling garments or linens, so you can still do it for free if you want.
Note: The yarn is kind of fiddley to work with so it’s a better project for older kids. The fabric strips will be easier for younger kids to work with.
After you collect your materials, you need corrugated cardboard for the loom.
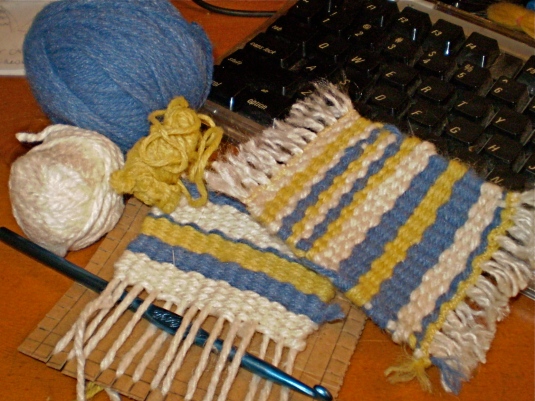
These little white and blue and yellow coasters were my first project. I made them on a cardboard loom about 4 1/2 inches square with little slits cut every quarter of an inch.
I first wrapped yarn back and forth around each of the quarter-inch notches.
These rows are called the warp of a weaving project. With those in place, I started weaving in and out of those rows. These rows of weaving are called the weft. When I got to the end of the row I made a u-turn and started back the other direction. This creates a selvage on two sides. Do the weaving with your fingers or use a crochet hook or yarn needle if you want.
After I finished the weaving, I clipped the yarn at the edge of the cardboard and then tied two strands of yard together in a tight little knot all the way across the ends. Of course, longer fringe will be easier to tie.
I untwisted the yarn to make the fringe fuller. A straight pin, or toothpick can help separate the fibers. After it was all fluffed out, I combed the fringe flat and trimmed it to a straight edge. I used scissors but if you flatten it with a clear ruler a rotary cutter might give a straighter edge.
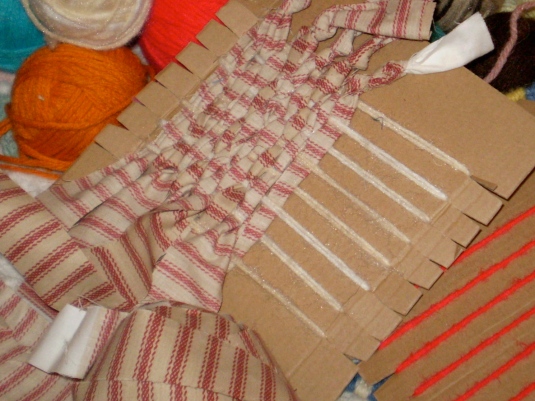
While I finished these up I remembered a basketful of fabric strips I’d torn for a crocheted rug once upon a time. Those rolled balls of fabric are still waiting to become a rug, but in the meantime, I tracked down my fabric strips and prepared to weave.
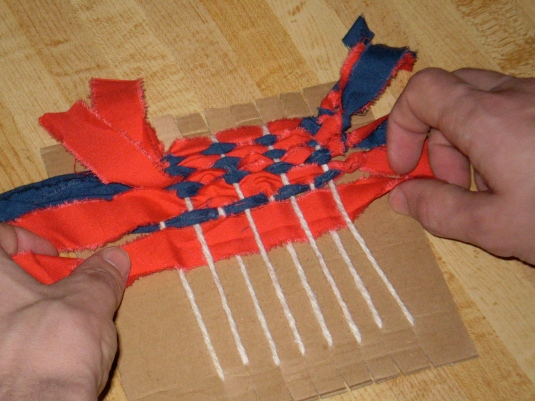
Since the fabric is bulkier than yarn, I made a larger loom. I cut the cardboard about 6 inches square and put the notches at half-inch intervals. I didn’t want these to be hugely bulky so I used yarn for the warp and wrapped eight rows of yarn around the loom.
I tied a red strip and a blue strip together before I started weaving this one.
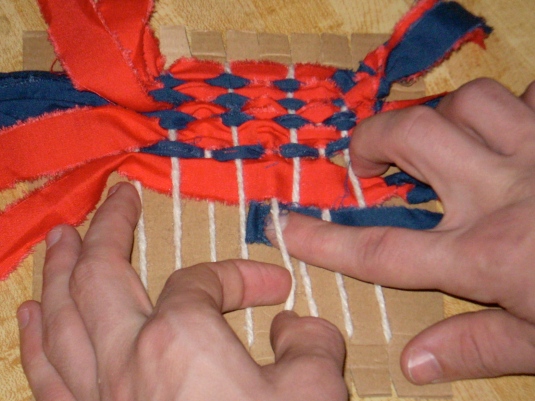
The half-inch loom makes it easy to weave with your fingers.
As you finish each strip of fabric smooth it across the length of the weaving before pushing each row up against the previous one for a tight weave
Wider spacing and wider strips of fabric will make this easier for little fingers to weave.  This blue one turned out a little larger than expected but it’s very handy to put under a dish headed for the microwave.
Spring break can be a busy week. Sometimes you stay home, and sometimes you take a family vacation. Either way, there’s always down time and this is the perfect project to take along. Just the right size for travel. Fill a plastic zipper bag with a handful of supplies and you’re good to go.
These make great teachers’ gifts. If you get the kids involved now, you’ll avoid the last-minute rush for the same ABC mug every other parent is shopping for when May rolls around.
Jan
I was inspired by Portable Saori Vacation Weaving by Pam at Gingerbread Snowflakes. Her weavings are head and shoulders above my simple little pieces but her post and tutorial got me started on them.


